E-ink frames
How I built a (hopefully) energy efficient, battery driven E-ink frame with fast responses to changes
Since I was a kid I have been interested in home automation, and photography. When the Internet was flooded during December 2025 by companies making e-ink frames I got interested. Unfortunately they didn’t appeal to me software wise; some of them were dependent on the cloud and some of them promised to get back to me with their protocol. They didn’t.
Cue a few months later, and I found a complete device on Seeed Studio’s webpage. A few links later and I found that they sold the parts for 100 USD less - so I ordered that - what could possibly go wrong?
My idea is that I want to select pictures from my library of those who visits me and show those pictures on the frames - preferably automagically. That leads us to the following problems:
- I need to properly label all photos in my library of those who might visit me
- I need to somehow detect who is visiting me
- I need to be able to update the images automatically
In this post I’ll focus on the last point - the frame and pictures. I’ll probably get around to touch on the other topics in the future.
I ordered the parts from Seeed in late February, they arrived to me in Sweden June 2nd… (The actual shipping time was around 10 days, the display was back-ordered).
I want the frame to, eh, be framed. I don’t want to fuss with cables so it must be battery powered and I also want it to react somewhat quickly to updates.
It boiled down to running the frame on battery, but to conserve battery I want it to sleep. But I also want it to react quickly-ish (preferably within 60 seconds).
I came up with the idea of having another device - the Frame Orchestrator, FO - that will broadcast BLE packets when updates are available (I decided on the iBeacon format). That means that the frame needs to wake up every now and then, and scan the environment for that particular iBeacon. If it exists it should boot the Wi-Fi, and download the image and update the screen.
Since the screen has slightly odd ratios (at least for me) - the screen measures slightly less than 27 cm on the widest side, but 21 cm on the other side makes it look quite odd in “regular” frames that are 21x29.7 cm (a regular A4). It would leave a quite ugly border on the top and bottom so I opted to go for a slightly bigger frame (30x40 cm) and get a custom passepartout for it - and hopefully “hide” the odd ratio.
Battery life
I want to make it fast to respond - but also keep it somewhat power efficient. The ones that I have seen wake up every now and then, does a full connection to some cloud service and then goes back to sleep. Often like every 15 minutes or so - which I think is too slow to respond.
My idea is to let the frame wake up more often, but listen for iBeacon frames targeting that particular frame. If there are none it goes back to sleep for another 30 seconds. If it however finds its beacon the device does a full connection towards the server and fetch the image.
Since the BLE iBeacon detection is completely passive it should be fairly low power usage. I haven’t yet really measured the power usage. Perhaps I need to go up to 60 seconds to get longer battery life.
iBeacons
They are an Apple developed protocol used for detecting proximity. Essentially the hardware broadcasts an advertisement that consists of an Apple iBeacon prefix, followed by a UUID (Universally Unique IDentifier), and a (major, minor) pair.
The UUID is a 128 bit random number, and the major and minor pair are 16 bits each for the user to define.
I slightly abused the UUIDs. The frame scans for a UUID that is an 80 bit shared prefix followed by the frame’s MAC address (which is 48 bits). I then code in the behaviour of the frame depending on the major/minor codes - should it do a refresh or should it stay awake (for instance for firmware flashing)?
I could have used the major/minor field for selecting which frame as well; but since I plan on running multiple of them I wanted to avoid any individual configuration (like telling one frame that it’s frame ID 0x1337 and another frame that it’s 0x7331). This way I can flash the same firmware onto all of them.
Parts list
| Item | Price |
|---|---|
| Seeed EE02 kit | 164 USD |
| Seeed Xiao ESP32-C3 (for frame orchestration) | ~4 USD |
| Battery 2000 mAh | 169 SEK (~17 USD) |
| Frame - Ikea Rödalm 30x40 | 99 SEK (~10 USD) |
| Passepartout - Custom | 210 SEK (~21 USD) |
| USB-C cable for FO | 39 SEK (~4 USD) |
| USB-C PD adapter | 39 SEK (~4 USD) |
| Screws for the baseboard | 29 SEK (~3 USD) |
Additional stuff I already had:
- Custom made jigs - Scrap filament lying around
- Machine screws and nuts (M2)
So the total cost for this build is about 227 USD + change, and additional frames will be slightly above 210 USD, given that the frames are in BT reach.
Assembly
I made a few jigs to center the active area of the screen in the frame. I cadded the frame in Fusion and marked out the physical outline of the panel and the active area. Centered the active area, and then created some jigs. Printed a few first, and I stupidly didn’t think of measuring the frame - it is sliiightly bigger than 30x40 so there was a lot of play…
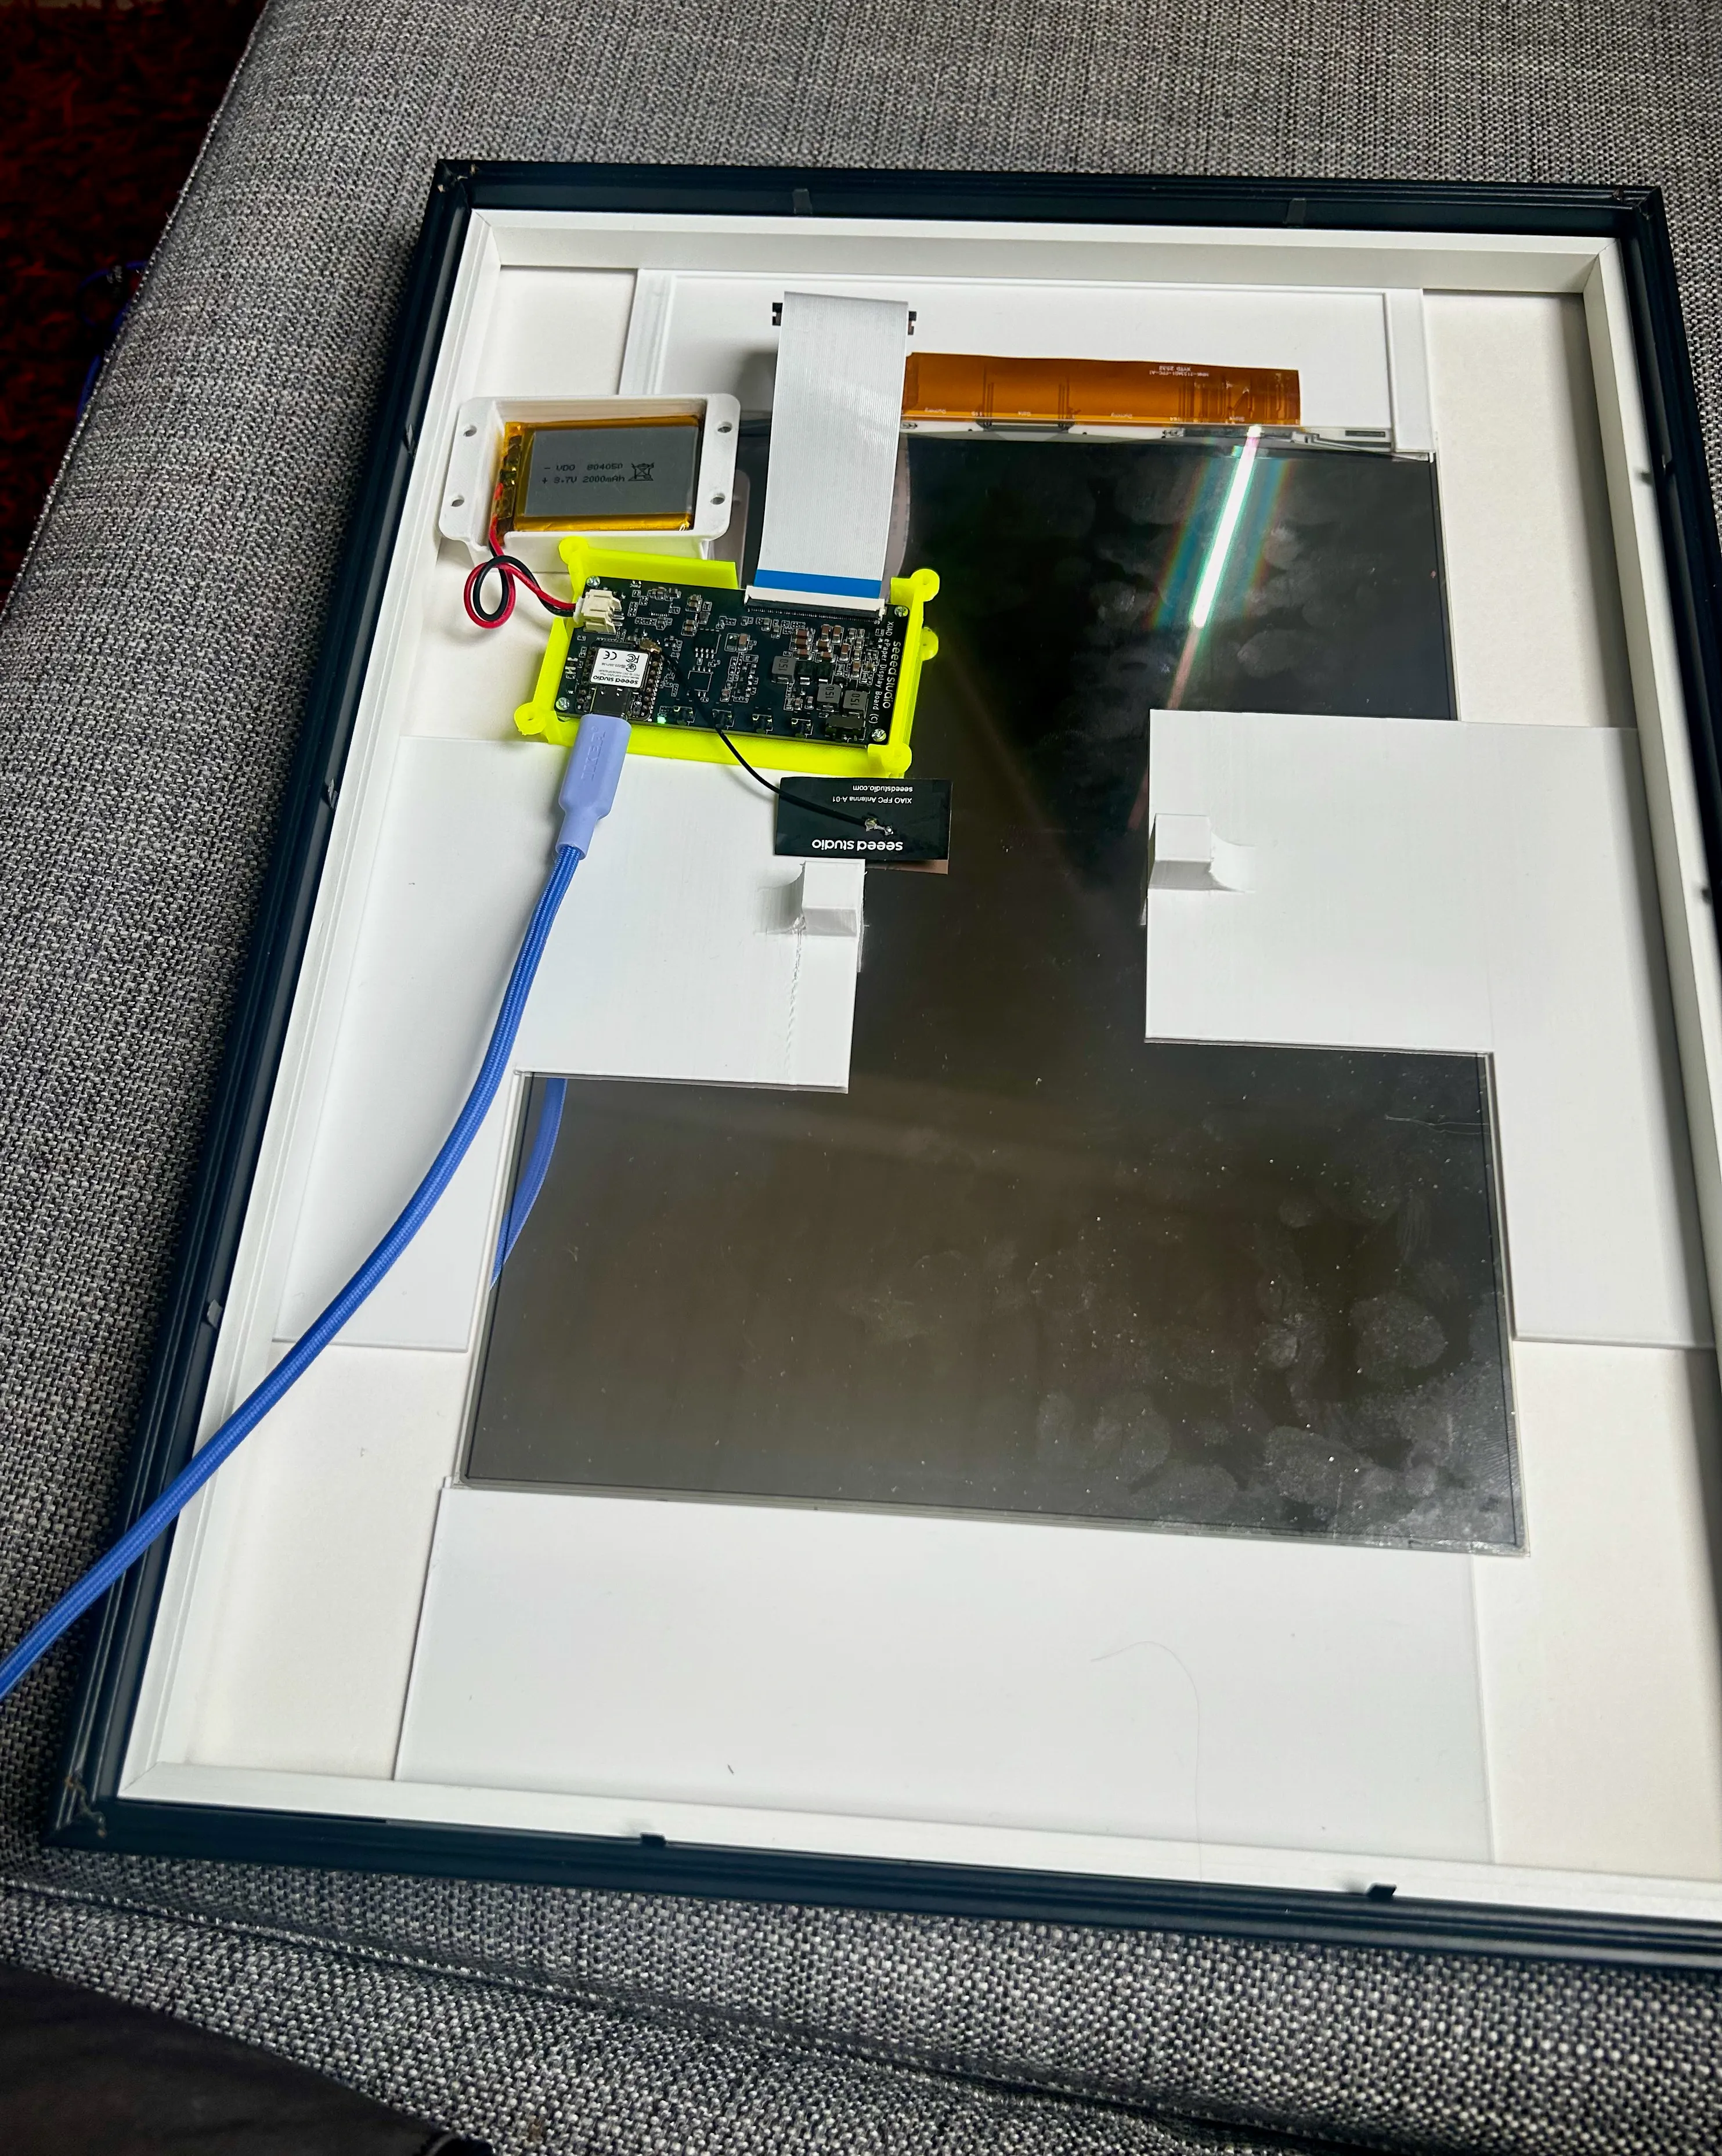
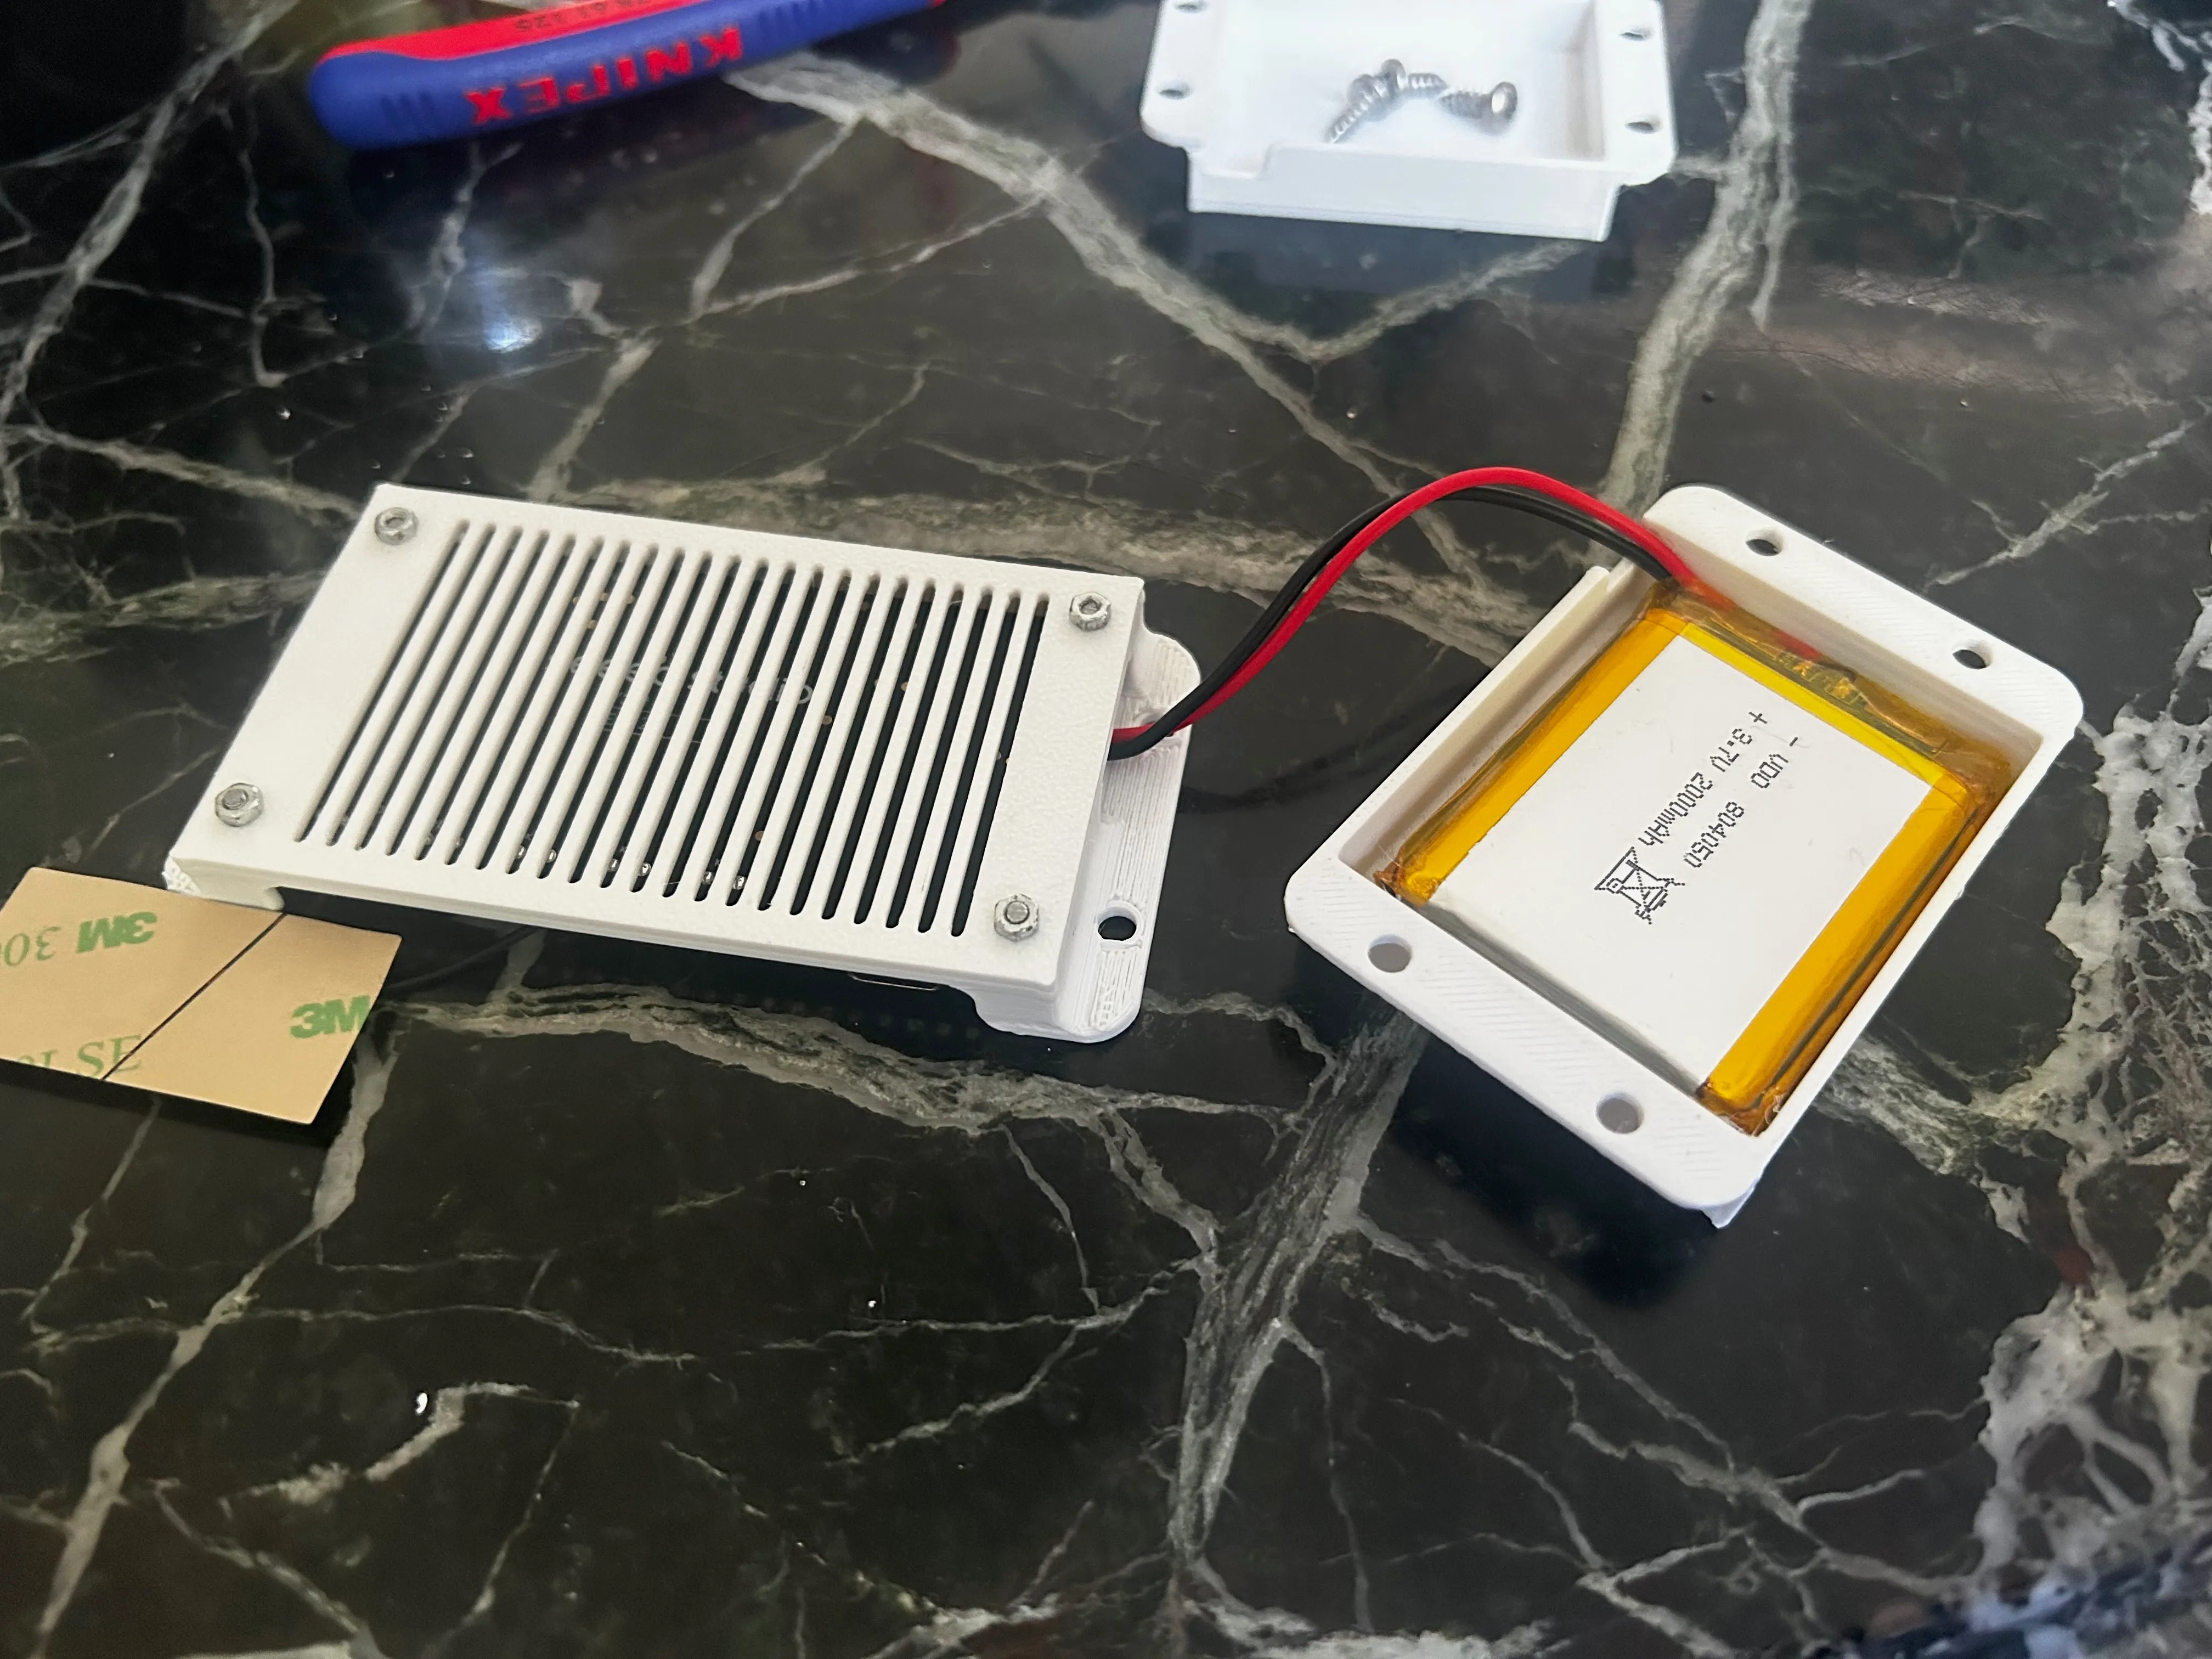
I also found someone else who also used Ikea Rödalm for the same screen (but the smaller frame) - my plan was to reuse their holder (the yellow one in the picture above) for the controller board, but I created my own battery holder. However, the screws I had was too big for that holder, so I whipped out a new model of my own design as well.
I then screwed the holders onto the masonite back side of the frame (just like My embedded stuff did).
Programming of the devices
I like ESPHome for programming ESPs. As mentioned before, I wanted to use iBeacons to signal to the frame that there was an update available. An iBeacon uses a UUID. Since they are 128 bits and I think I want more screens in the future, I devised a plan of using an 80 bits prefix and the controller board’s MAC address (which is 48 bits) as the suffix to be able to specify which frame to use.
The frame orchestrator
There is an ESPHome component already that broadcasts beacons, but it is not configurable. I also want to be able to update several frames simultaneously. It ended up being a custom component, configured with the prefix and broadcast duration. It has a method to add a MAC address, and when it is added the MAC address will be broadcast for the configured interval.
I ended up using MQTT to inform the orchestrator that there is a new image. The built-in on_message handler doesn’t provide the topic - but it is exposed from the library - so the setup is something like:
on_connect: - lambda: |- static bool subscribed = false; if (!subscribed) { subscribed = true; id(mqtt_client)->subscribe("frames/+", [](const std::string &topic, const std::string &payload) { auto pos = topic.find_last_of('/'); std::string leaf = (pos == std::string::npos) ? topic : topic.substr(pos + 1); id(walker)->add_mac_from_string(leaf); }); }The screen
I found that someone has already written a component for the screen - I’m very grateful for that!
The device is set up so that when it boots it downloads the latest image and shows it, then it goes to sleep for ~30 seconds. It wakes up, and passively listens for ~1 second for the beacon - if it is not there, it goes back to sleep - otherwise it starts the Wi-Fi component and fetches the image. If there has not been an update for 24 hrs, the device still wakes up the Wi-Fi radio and updates Home Assistant with the battery level (which is technically the only connection to HA here).
The image flow
The Spectra display can show six colours (black, white, red, yellow, green and blue). That means that I can’t just take a picture and throw it on there. Well, I can, but would look bad. I need to do something called dithering. The actual rendered colors are quite muted. The folks at paperlesspaper have released an EPDoptimizer, which had a palette optimized for the screen, so I borrowed that. I wrote the ditherer in C# - It takes an image or an image url as input, dithers the image (Using Floyd-Steinberg) and sends the mqtt message to wake up the frame. The frame then downloads the image from the ditherer and shows it.
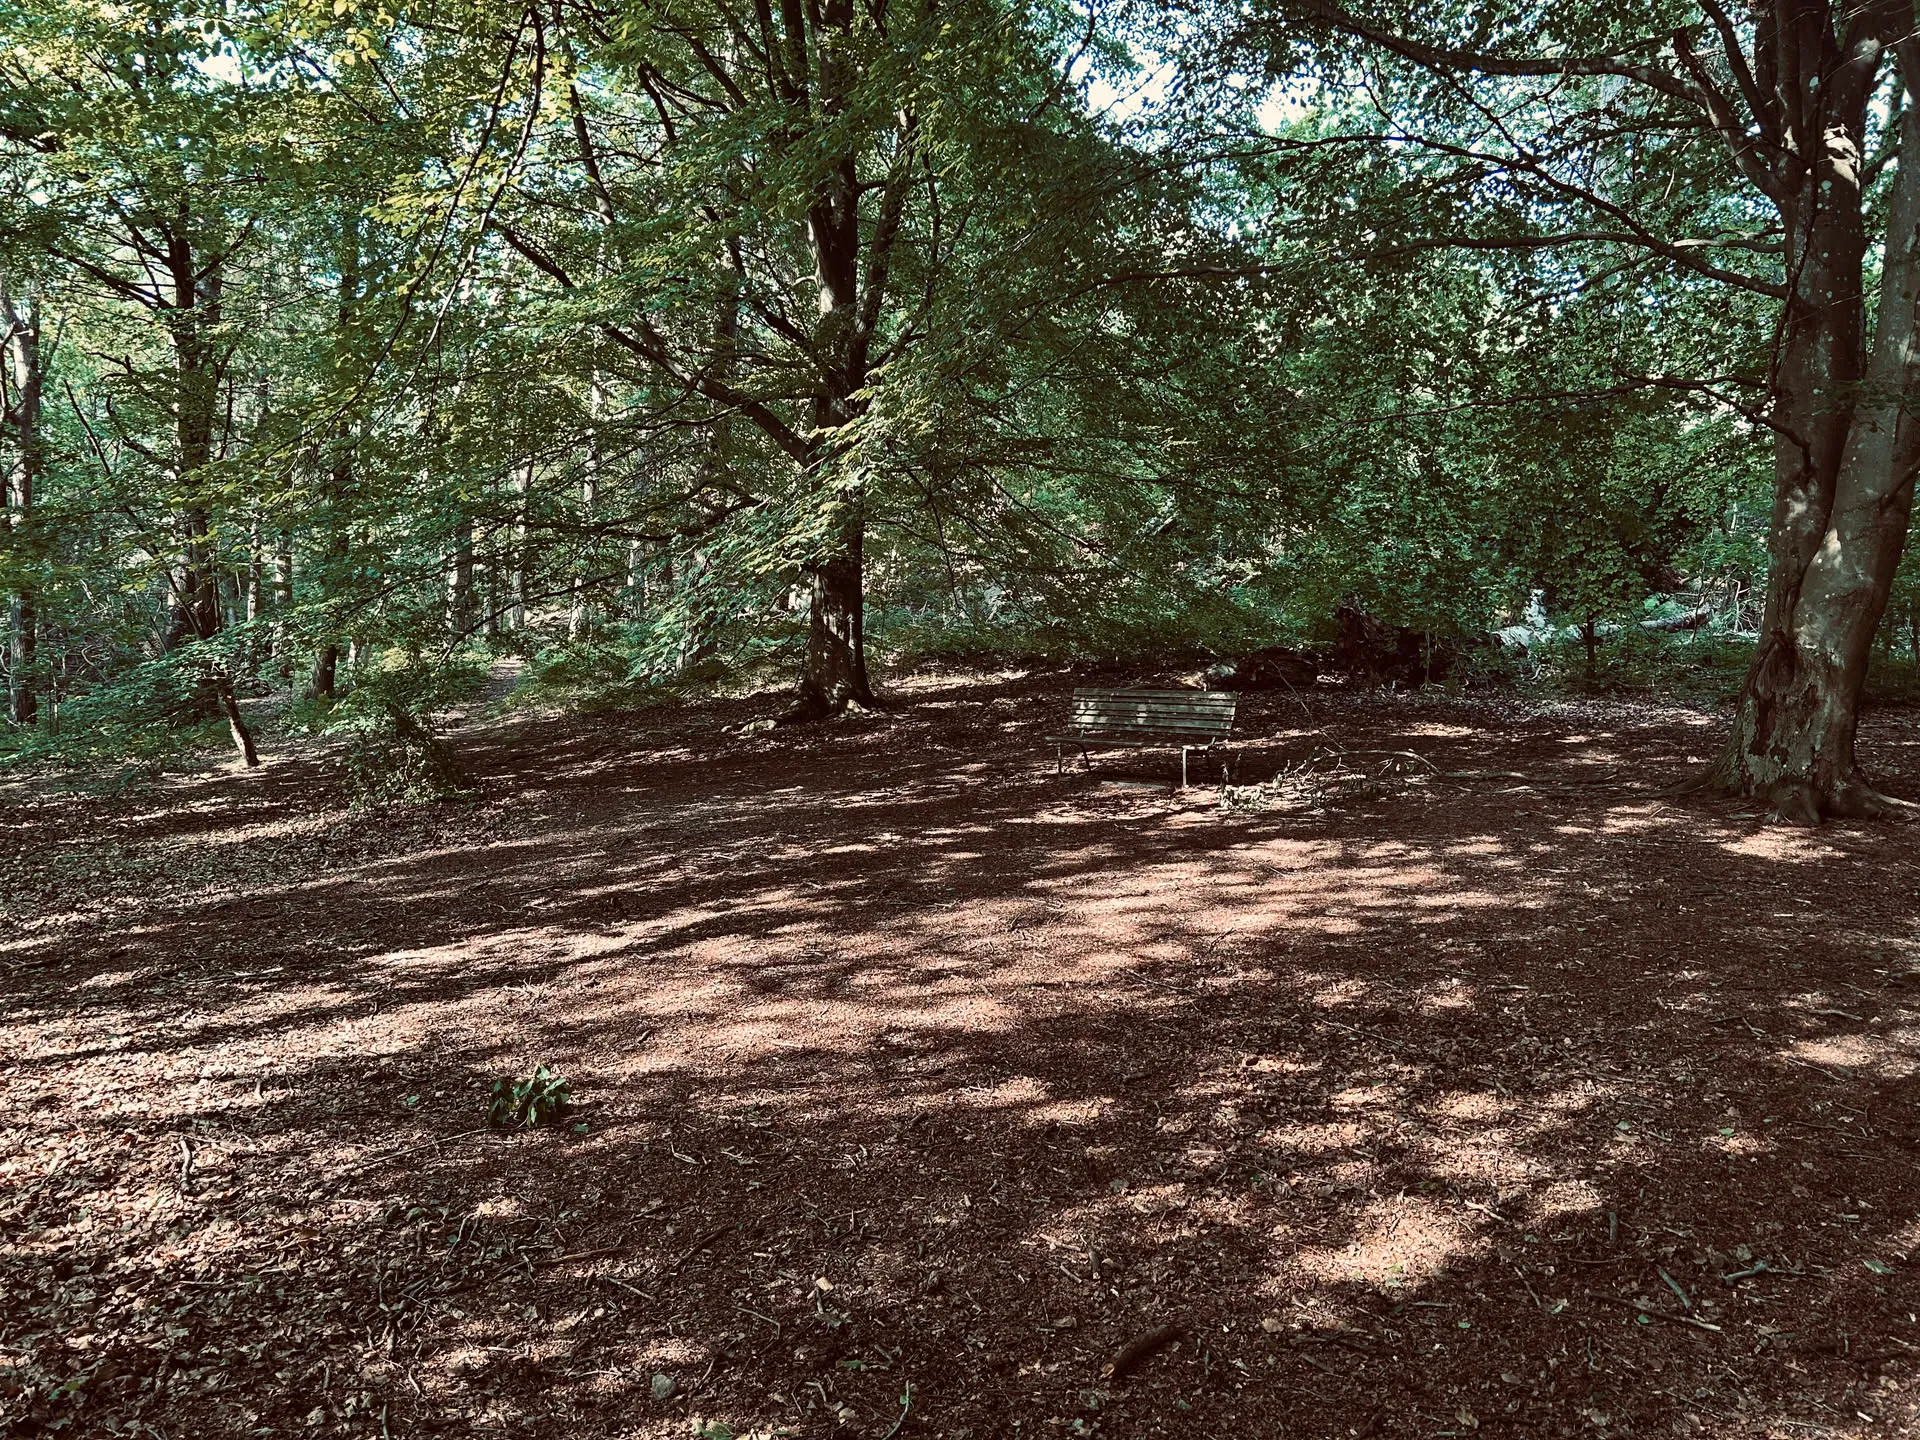
An input image that looks like this:
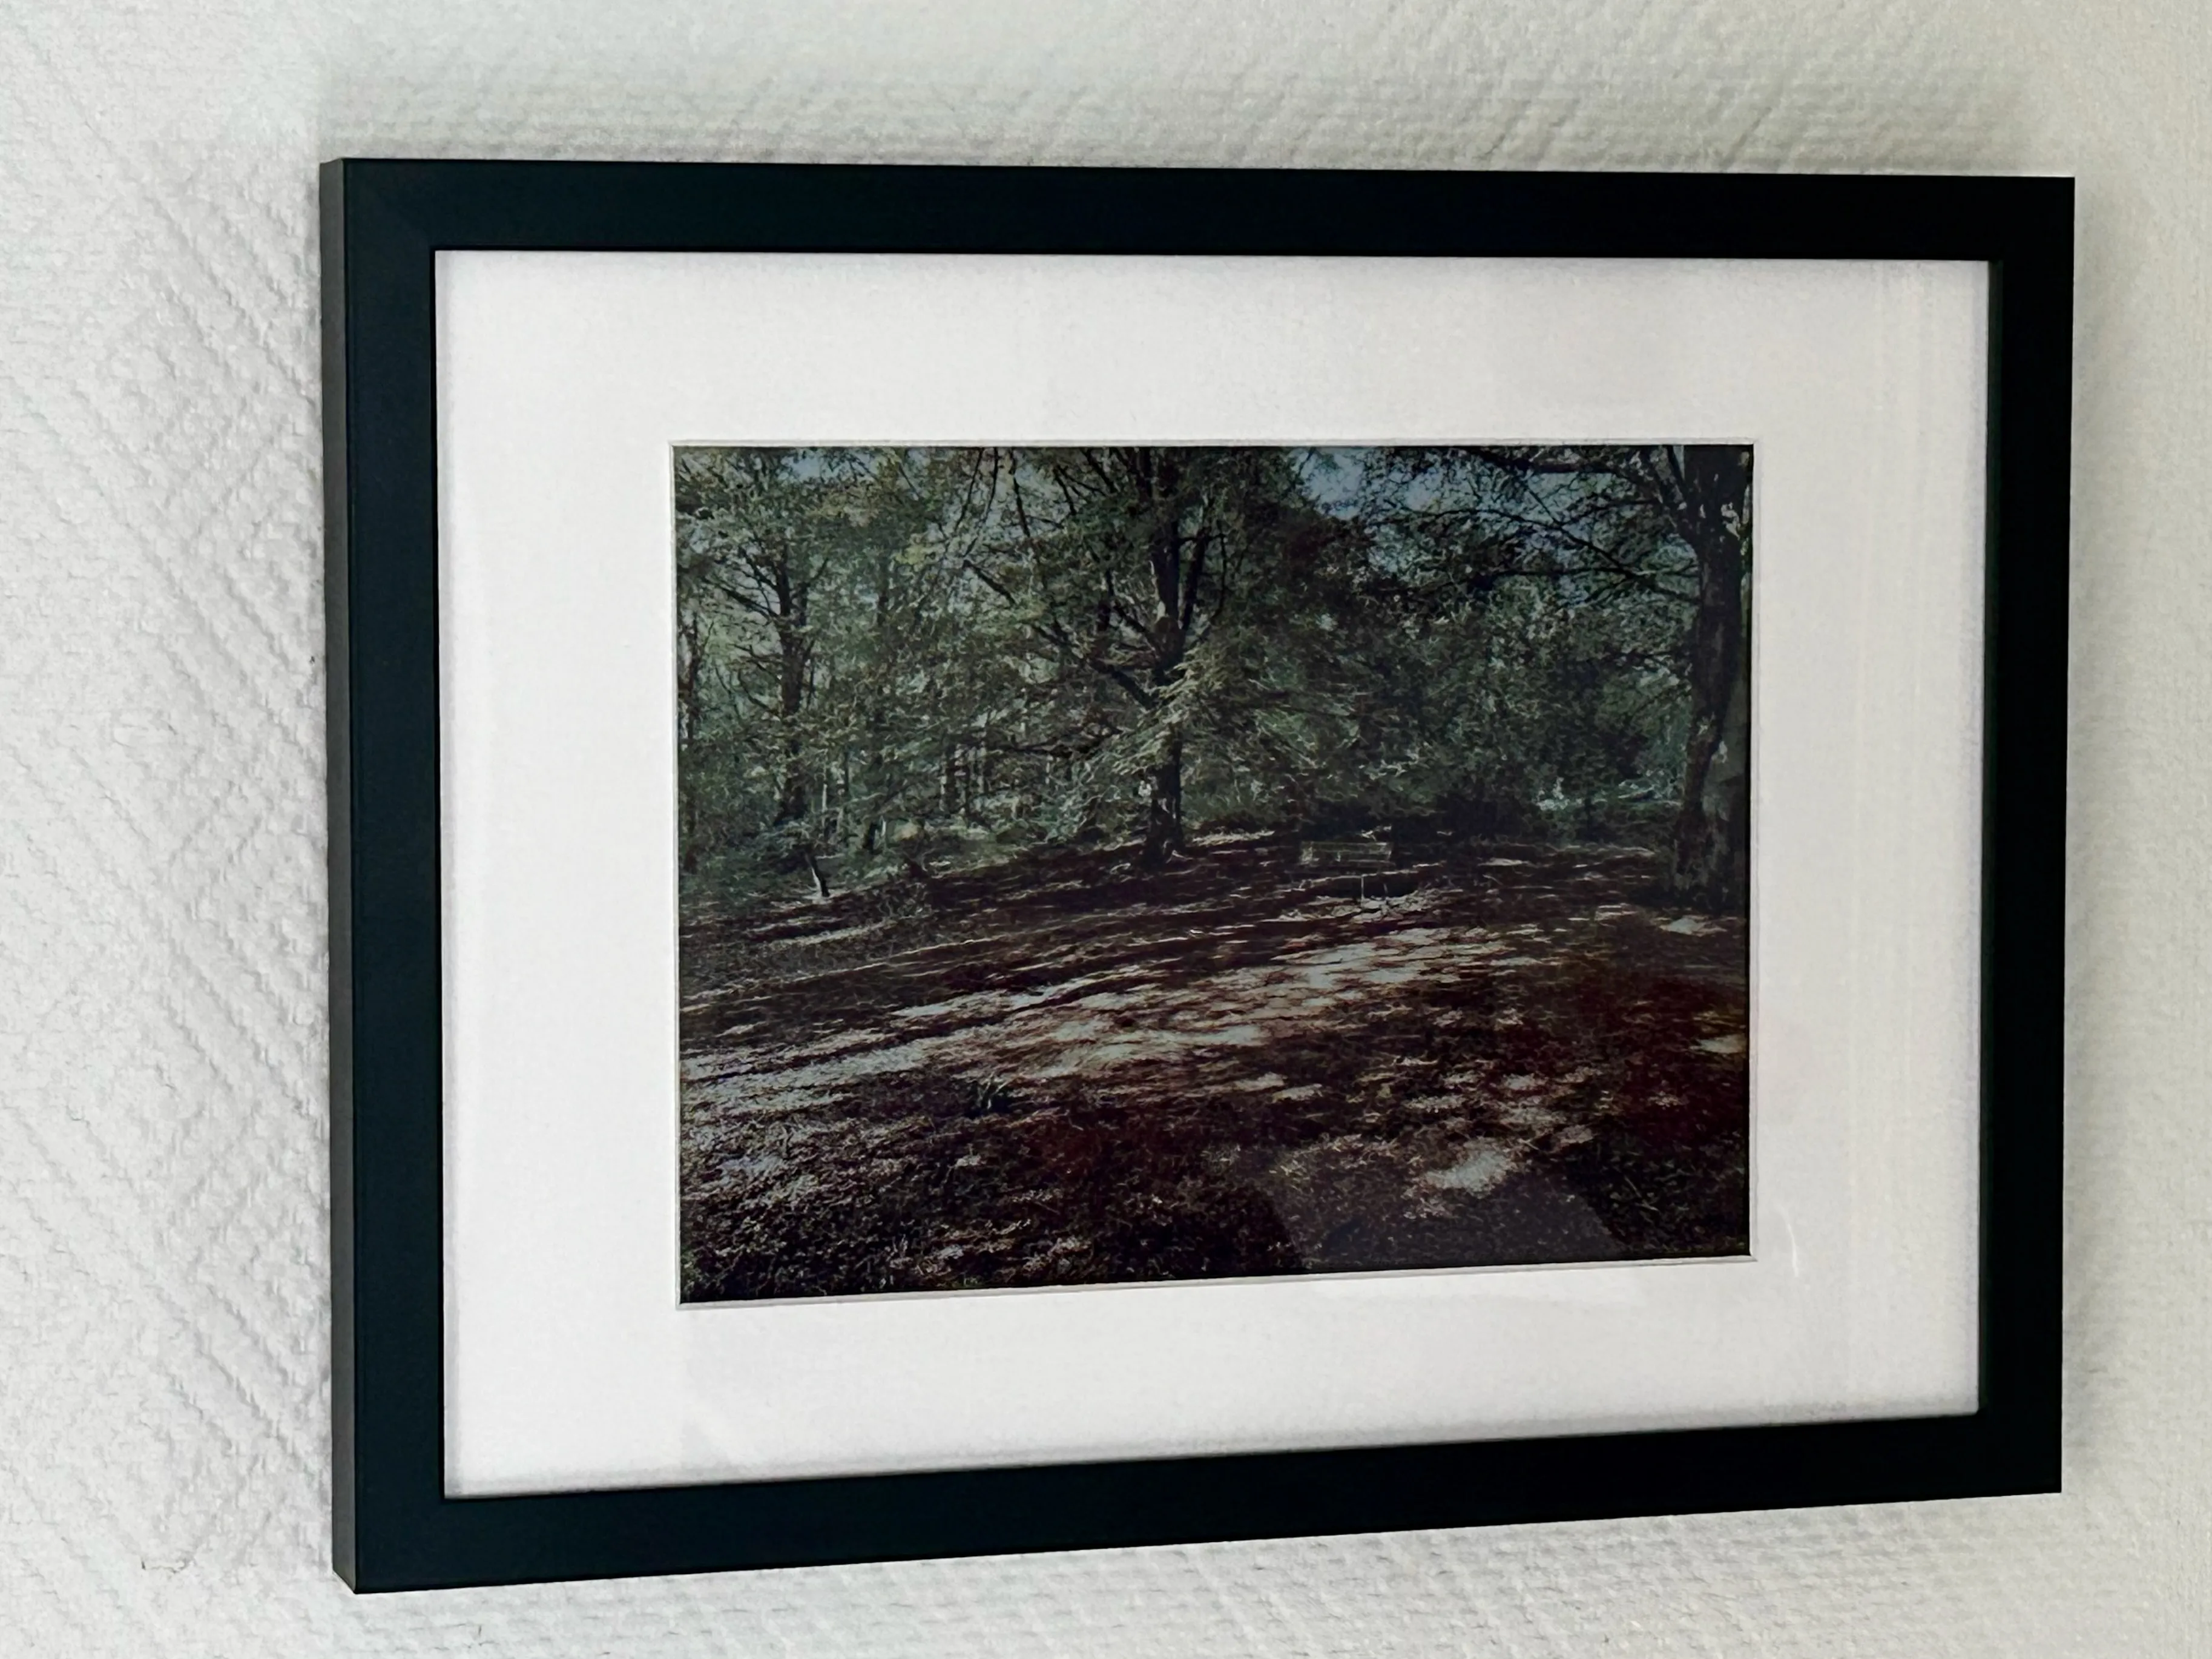
After dithering and palette mapping (i.e. this is what’s sent to the display)

The final product
Future work
To improve charging I’m thinking of exposing an USB-C port to the side of the frame, using an USB-C extension cable.
The code can be found here:
- Frame
- Frame orchestrator
- Ditherer (I wrote the cornerstone specs and then Claude built the rest while I was out mowing the lawn)
Please note that the code is mostly still a mess - it works but it’s undocumented. Do ask me if you’re interested in something that’s not explained in detail and I’ll try to update!